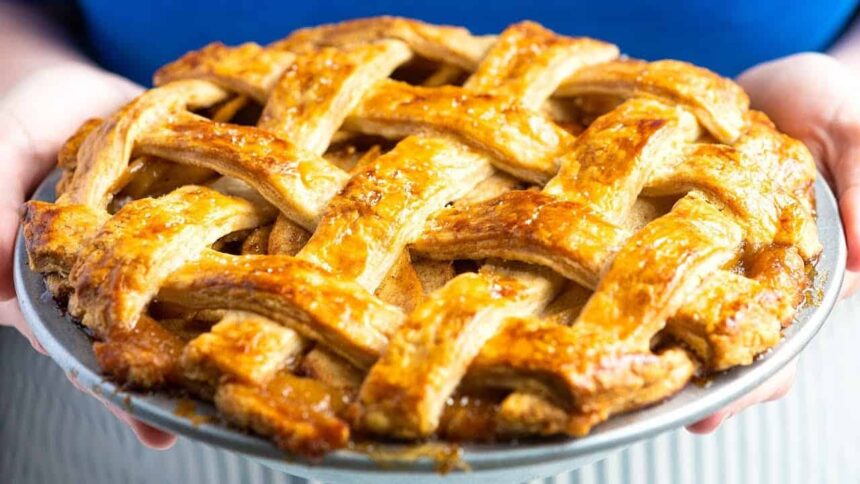
Introduction:
Apple pie is a quintessential American dessert, beloved for its flaky crust and sweet, spiced filling. This classic treat is perfect for any occasion, from holiday gatherings to casual family dinners. In this article, we’ll guide you through a tried-and-true apple pie recipe, offering tips and tricks to ensure your pie turns out delicious every time. Whether you’re a seasoned baker or a novice in the kitchen, you’ll find this recipe easy to follow and absolutely rewarding.
Ingredients:
For the Crust:
- 2 1/2 cups all-purpose flour
- 1 cup unsalted butter, chilled and cubed
- 1/2 teaspoon salt
- 1/2 cup ice water
For the Filling:
- 6-8 medium apples (Granny Smith or Honeycrisp work well), peeled, cored, and sliced
- 3/4 cup granulated sugar
- 1/4 cup brown sugar
- 1 teaspoon ground cinnamon
- 1/4 teaspoon ground nutmeg
- 1 tablespoon lemon juice
- 2 tablespoons all-purpose flour
- 1 tablespoon unsalted butter, cut into small pieces
For the Topping:
- 1 egg, beaten (for egg wash)
- 1 tablespoon granulated sugar
Instructions:
Preparing the Crust:
- In a large bowl, mix the flour and salt. Add the chilled, cubed butter and use a pastry cutter or your fingers to blend until the mixture resembles coarse crumbs.
- Gradually add ice water, one tablespoon at a time, mixing until the dough begins to come together. Divide the dough in half, shape into discs, wrap in plastic wrap, and refrigerate for at least one hour.
Making the Filling:
- Preheat your oven to 425°F (220°C).
- In a large bowl, combine the sliced apples, granulated sugar, brown sugar, cinnamon, nutmeg, lemon juice, and flour. Toss until the apples are well coated.
Assembling the Pie:
- On a lightly floured surface, roll out one disc of dough to fit a 9-inch pie dish. Transfer the dough to the pie dish, allowing excess to hang over the edges.
- Fill the crust with the apple mixture, mounding it slightly in the center. Dot with small pieces of butter.
- Roll out the second disc of dough and place it over the filling. Trim any excess dough, then crimp the edges to seal. Cut a few slits in the top crust to allow steam to escape.
- Brush the top crust with the beaten egg and sprinkle with granulated sugar.
Baking the Pie:
- Bake in the preheated oven for 20 minutes. Then, reduce the temperature to 375°F (190°C) and bake for an additional 35-40 minutes, or until the crust is golden brown and the filling is bubbly.
- Allow the pie to cool on a wire rack for at least two hours before serving.
Conclusion:
Apple pie is a beloved dessert that brings comfort and joy to any table. By following this classic recipe, you can create a delicious and visually appealing pie that will impress your family and friends. Remember, the key to a perfect apple pie lies in selecting the right apples and ensuring your crust is flaky and well-prepared. Happy baking!
FAQs:
Q1: What are the best apples to use for apple pie?
Granny Smith and Honeycrisp apples are great choices due to their balance of sweetness and tartness, as well as their ability to hold their shape during baking.
Q2: Can I use store-bought pie crust?
Yes, you can use store-bought pie crust for convenience. However, making your own crust often results in a flakier, more flavorful pie.
Q3: How do I prevent a soggy bottom crust?
To avoid a soggy bottom crust, ensure your oven is fully preheated before baking. You can also blind-bake the bottom crust for a few minutes before adding the filling.
Q4: Can I make apple pie in advance?
Yes, apple pie can be made a day in advance. Store it at room temperature or in the refrigerator, and warm it up slightly before serving if desired.
Q5: How should I store leftover apple pie?
Cover the pie loosely with aluminum foil or plastic wrap and store it at room temperature for up to two days, or in the refrigerator for up to five days. You can also freeze apple pie for longer storage.
